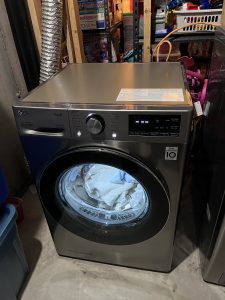
Combatting Mold in Your Front Load Washer: A Comprehensive Guide
Front-load washing machines, a godsend for those residing in condos or other compact living spaces, are known for their space-saving design. These machines let you make the most out of your available area by allowing the dryer to be stacked on top of the washer. But convenience often comes with a caveat, and in this case, it's the unpleasant prospect of mold build-up. This persistent problem, especially around the gasket (the rubber seal between the washer's door and basket), can dampen the convenience of owning a front-load washer.
In this guide, we'll take you through two practical solutions to banish mold from your life – replacing the gasket or taking the DIY route to clean it. But first, let's delve into...
Why You Should Declare War on Mold, Now!
It's easy to ignore what happens in your washer post the 'START' button press. However, it's vital to note that each wash cycle is a party to dirt, water, and lint. Together, they form the perfect breeding ground for bacteria, culminating in mold build-up.
Postponing your battle with mold can lead to unpleasant outcomes. First, mold is infamous for its odious smell, sabotaging your efforts to maintain fresh, clean clothes. Worse still, prolonged exposure to mold can seriously affect your health, making you feel perpetually under the weather. So, at the first sight of mold on your gasket, spring into action!
Professional Gasket Replacement: The Trouble-Free Route
Hiring a professional appliance repair company to replace your washer's gasket is the easiest, safest, and most convenient way to tackle mold build-up. Washing machines, with their intricate design, are best left to seasoned technicians.
A botched DIY job can worsen the situation, leading to either washer damage or health hazards. AllAppliance Tech's team of experienced technicians have dealt with numerous gasket replacements owing to mold build-up. You can trust us to handle the issue quickly and efficiently.
Embrace Your Inner Cleaning Guru: The DIY Approach
If you're feeling adventurous, you could opt to clean the gasket yourself. Thankfully, this task can be completed without having to remove the gasket from your washer. Let's look at two methods:
-
Vinegar: The Eco-friendly Warrior
- Equip yourself with gloves and safety goggles.
- Fill a spray bottle with vinegar.
- Douse the mold with vinegar and let it sit for 2 to 4 hours.
- Rinse the gasket with water.
- Leave the washer door open to let the rubber dry.
- Bleach: The Quick Solution
- Remember to wear gloves and goggles.
- Mix one part bleach with four parts water.
- Fill a spray bottle with the mixture.
- Spray the mold with the mixture and wait for 15 minutes.
- Use a brush to scrape the mold away.
- Rinse with water.
- Leave the washer door open to let the rubber dry.
Preventive Measures and Maintenance Schedule
Now that we've dealt with the mold, here are a few tips to prevent it from making a comeback:
- Leave the washer door open after use to allow air circulation.
- Use the right amount of detergent to avoid residue build-up.
- Run a cleaning cycle at least once a month.
By incorporating these steps into a regular maintenance schedule, you can keep mold at bay.
Putting an End to Mold: Your Next Steps
Mold on your washer's gasket is a matter of serious concern and warrants immediate action. You can trust AllAppliance Tech to handle all your washer repair needs. We offer prompt and reliable repair services. So, if you're looking for a stress-free solution to your mold problem, give us a call or fill out a contact form on our website. We guarantee same-day services to remove that pesky mold from your washer's gasket. Say goodbye to mold and hello to clean, fresh clothes!


